10+ years of helping amazon sellers ! GET BACK ON TRACK ! REACTIVATE YOUR ACCOUNT NOW

How to Grant User Permissions on Amazon: A Step-by-Step Guide
Learn how to grant user permissions on Amazon Seller Central with this easy step-by-step guide. Manage account access effectively to ensure secure and smooth operations
MD MUSTAFEEZ ALAM
1/9/20253 min read
Affiliate Disclosure: Some links in this post may be affiliate links, meaning we may earn a commission if you click and make a purchase, at no extra cost to you. We only recommend products and services we trust and believe add value to our readers.


Why Grant User Permissions on Amazon?
Giving user permissions on Amazon allows you to delegate specific tasks, such as inventory management, customer service, or account health monitoring. By assigning roles, you maintain control over your account while ensuring that only the necessary areas are accessible to the user. This feature is particularly helpful when working with Amazon consultants, reinstatement experts, or team members.
Key Benefits of User Permissions:
Enhanced Security: Avoid sharing your primary account credentials.
Task Delegation: Assign specific roles to team members.
Activity Tracking: Monitor actions performed by different users.
Compliance: Adhere to Amazon’s security and operational guidelines.
Step-by-Step Guide to Granting User Permissions
Follow these steps to securely provide user permissions on Amazon:
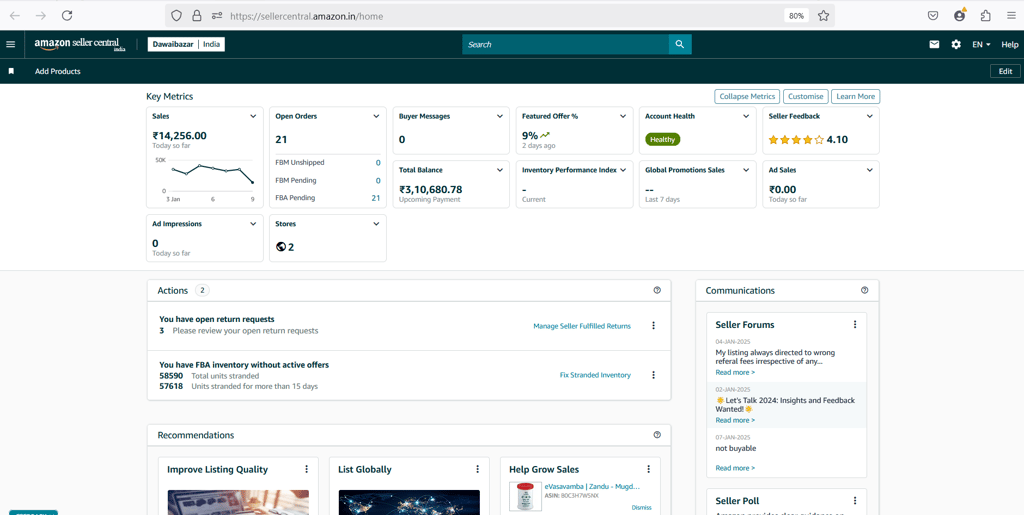
Step 1: Log in to Your Seller Central Account
Go to Amazon Seller Central.
Use your primary account credentials to log in.
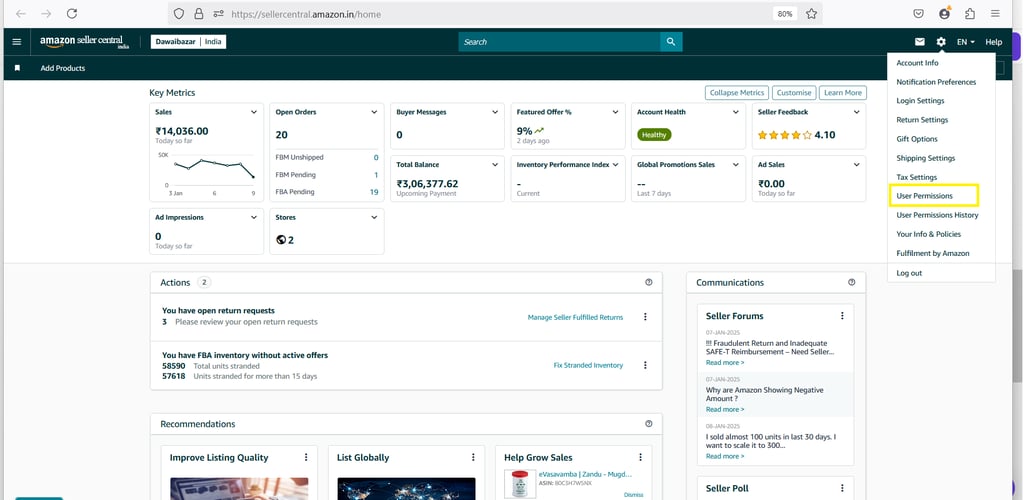
Step 2: Access the "User Permissions" Section
From the main dashboard, navigate to Settings (located in the top-right corner).
Select User Permissions from the dropdown menu.
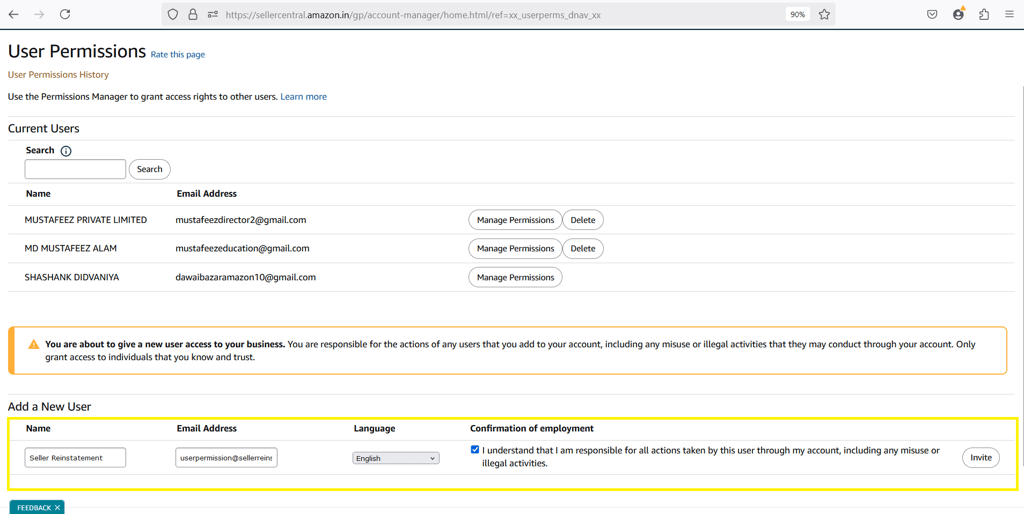
Step 3: Invite a New User
Under the Add a New Seller Central User section, enter the email address of the person you want to invite.
Click Send Invitation. The user will receive an email with instructions to accept the invitation.
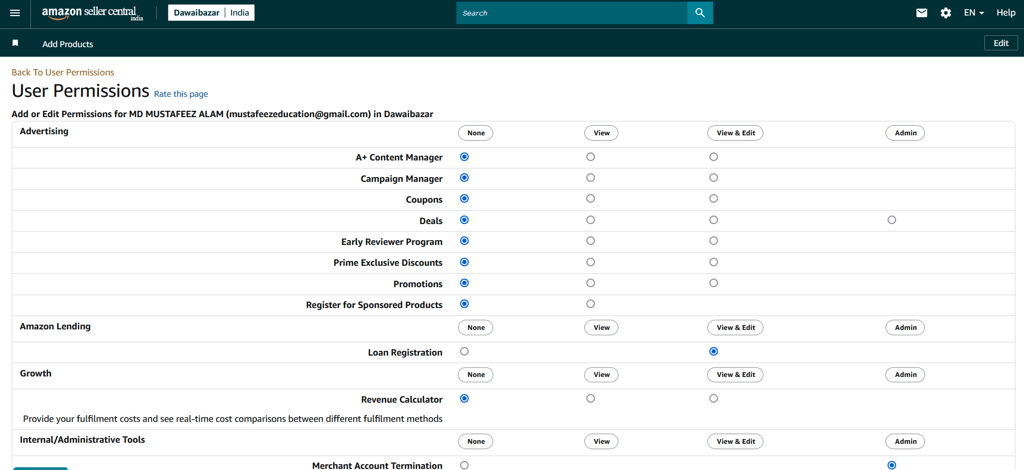
Step 4: Assign Permissions
Once the user accepts the invitation:
Return to the User Permissions page.
Locate the user’s name under the "Current Users" section.
Click Manage Permissions next to their name.
Assign roles by toggling the permissions for areas like:
Inventory Management
Order Management
Advertising Reports
Account Health
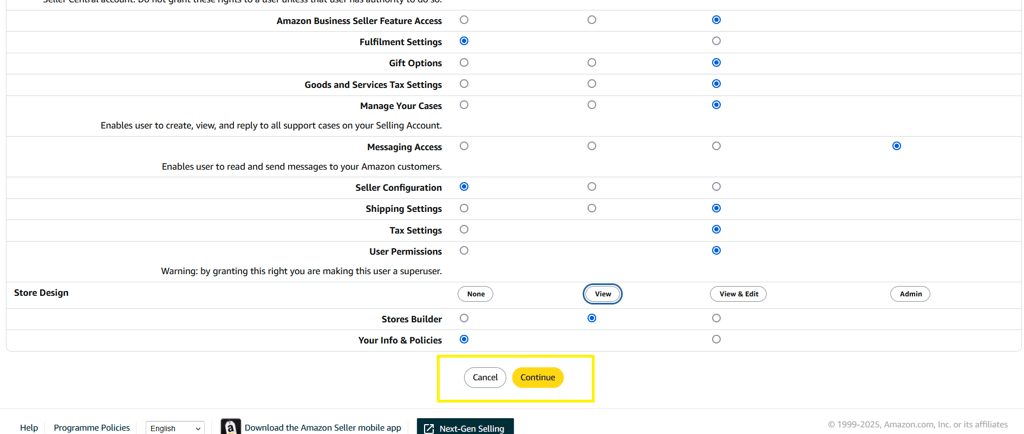
Step 5: Review and Save Changes
Double-check the permissions assigned.
Click Save to apply changes
Best Practices for Managing User Permissions
To ensure your account remains secure and efficient, follow these best practices:
1. Grant Minimal Access
Only provide access to the specific sections the user needs.
Avoid granting full access unless absolutely necessary.
2. Regularly Review Permissions
Periodically review user permissions and revoke access for inactive users.
3. Enable Two-Step Verification
Enhance security by enabling two-step verification on your Amazon account.
This adds an extra layer of protection.
4. Monitor User Activity
Keep track of changes made by users to ensure compliance and accountability.
Frequently asked questions
Can I grant access without sharing my login credentials?
Yes, Amazon’s User Permissions feature allows you to provide access without sharing your primary login information.
How many users can I invite?
There is no strict limit on the number of users, but Amazon recommends managing permissions efficiently to avoid security risks
Can I change or revoke permissions later?
Our pricing varies depending on [what factors affect your price]. We offer a variety of options to fit your needs and budget. Please visit our [pricing page/contact us] for more information.
Boost Your Amazon Selling Experience with Professional Help
Need help with account reinstatement or optimization? Contact Seller Reinstatement today for expert advice and tailored solutions.
Phone
+91-9708109746
userpermission@sellerreinstatement.com
Related Blogs:
© 2014-2025. All rights reserved.
Amazon Services
Amazon Seller Reinstatement
Amazon Seller Flex Enrollment
Amazon Prime Enrollment
Amazon Brand Approval
Amazon Account Management
Amazon Food & Grocery Approval
Amazon Brand Store
Amazon Account Reinstatement
Performance-Based Suspensions
Policy-Related Suspensions
Linked Account Suspensions
Inauthentic Item Suspension
Account Verification Suspension
Manipulative Practices Suspension
Dropshipping Policy Violation
Expired Product Suspension
Safety & Compliance Suspension
Payment & Fee-Related Suspension
Suspicious Activity Suspension
Fair Pricing Suspension
Customer Service Suspension
Tax Compliance Suspension